Integrating GenderAPI with Zapier: A Complete Guide

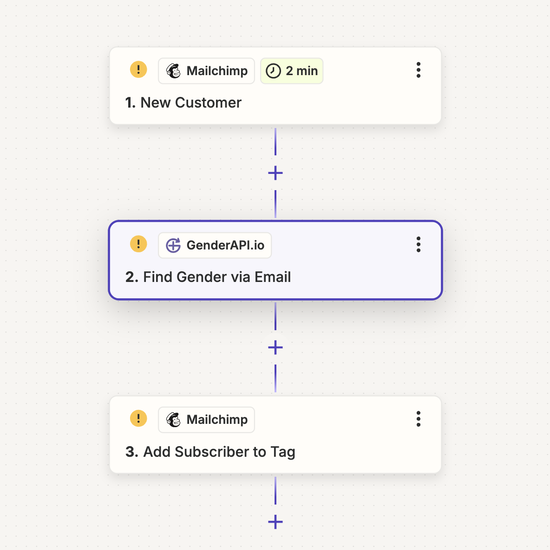
Discover how to connect GenderAPI with Zapier and automate gender identification in your workflows. Follow this comprehensive guide to achieve smooth and effective automation.

Before starting the step-by-step guide, please connect the GenderAPI Zapier Integration by clicking the button below.

Connect Integration
GenderAPI Zapier

Step-by-Step Guide to Using the GenderAPI Zapier Integration

Step 1: Track New Customers with Mailchimp

  • Create a new Zap in Zapier.
  • For the first step, add the Mailchimp app.
  • Select "New Customer" as the Trigger event. This step will trigger the workflow when a new customer is added to Mailchimp.
  • Connect your Mailchimp account by clicking the Connect Mailchimp button and providing the necessary permissions.

Step 2: Use GenderAPI to Find Gender via Email

  • For the second step, add the GenderAPI app.
  • Select "Find Gender via Email" as the Action event.
  • Connect your GenderAPI account by clicking the Connect GenderAPI.io button.
  • This step will use the new customer's email address to determine their gender.

Step 3: Update Subscriber with a Tag in Mailchimp

  • For the third step, add the Mailchimp app again.
  • Select "Add Subscriber to Tag" as the Action event.
  • Select "Add Subscriber to Tag" as the Action event.

Step 4: Test the Workflow

  • After setting up all the steps, test your Zap.
  • Ensure that when a new customer is added to Mailchimp, the system automatically retrieves the gender via GenderAPI and updates the customer with the appropriate tag in Mailchimp.